How To Import Contacts In Keap/ Infusionsoft

The most common type of import is a contact import, but Keap also allows you to import companies, tags, products, and subscriptions along with contacts. The process for each type of import is almost identical.
Importing contacts is neither very hard nor overly time-consuming. Here’s how to import contacts in Keap /Infusionsoft.
Before importing contacts in Keap, ensure that your data is in CSV, XLSX, or XLS file format and that they have been appropriately prepared.
Also, during the import, Keap will automatically scan emails for non-marketable domains, invalid email addresses, disposable addresses, and delinquent (not used for >12 months) email addresses. If problem email addresses are found, you will be notified and allowed to review those email addresses. Let's start learning how to import contacts in Keap.

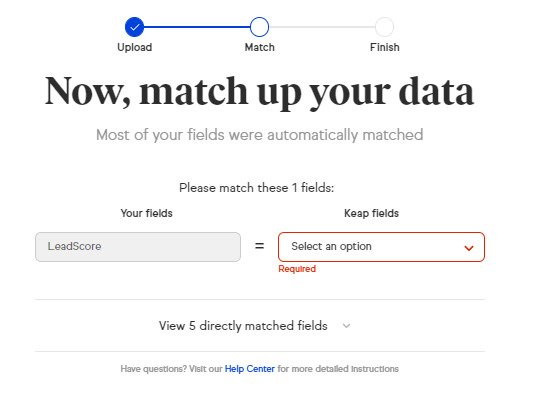 Click the Show matched fields link at the bottom of the screen to view the auto-matched fields and click Next once all fields match correctly.
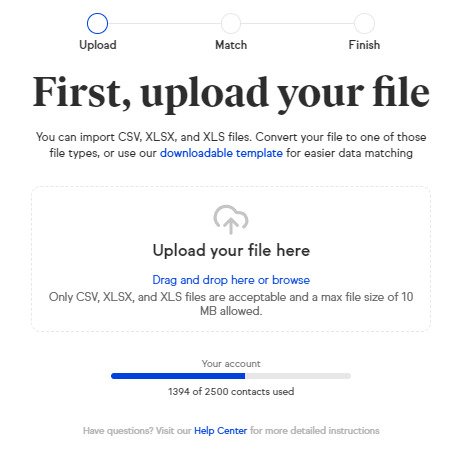
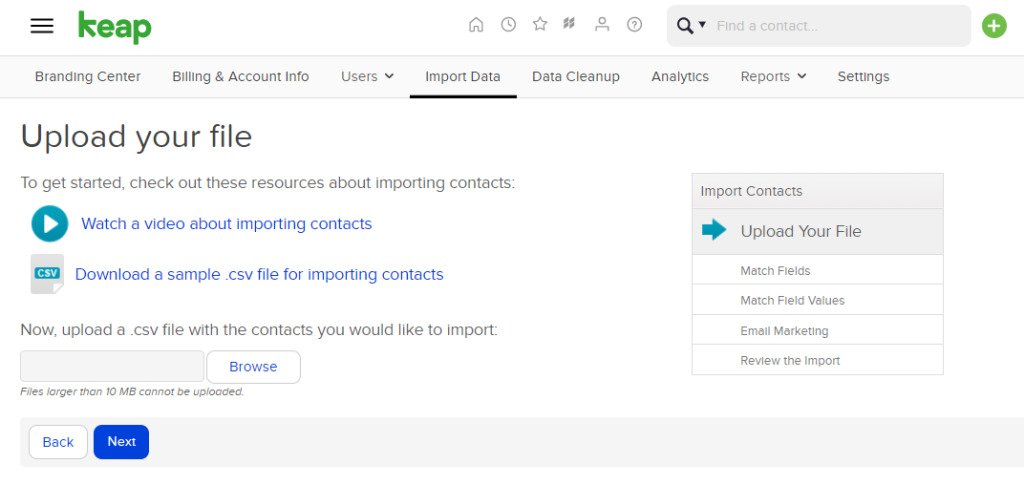 Browse your import file from your computer and click Next to start the import wizard.
Also, if your file contains too many contacts and you go over your contact limit, you will see the message “You are unable to import these people because it will put you over your limit of 20000”.
At this time, you can either purchase an additional contact package or clean old contacts from your database.
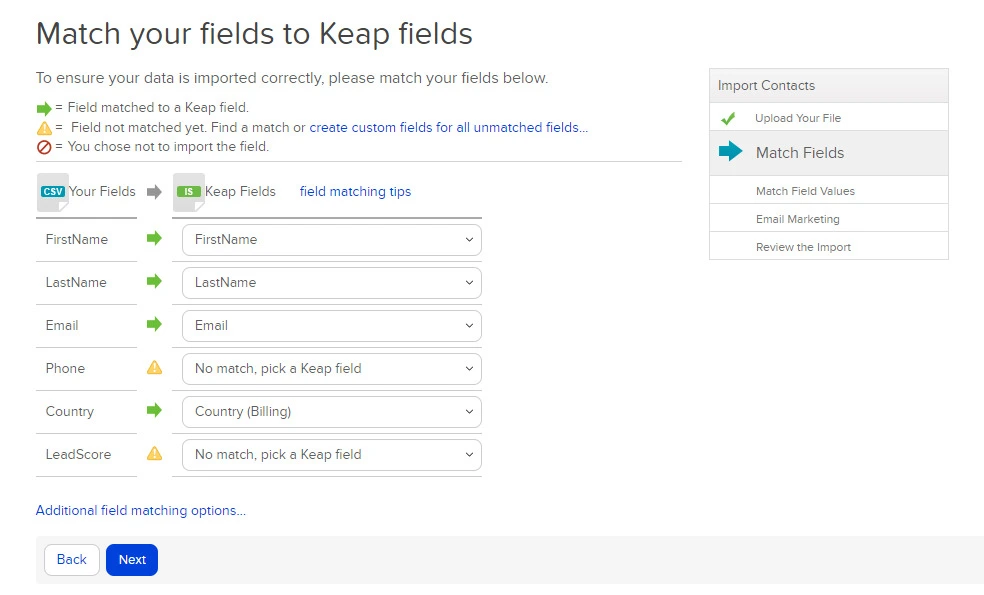
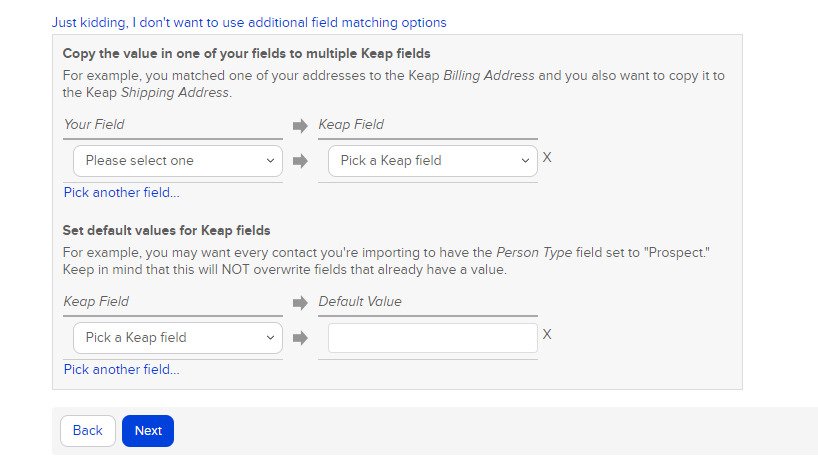 Click Next once you have finished mapping your fields with Keap fields.
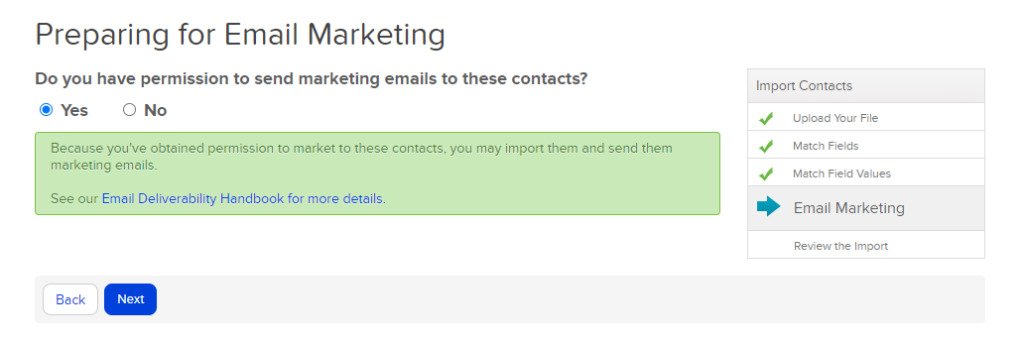 Click Next after you have successfully selected the email marketing permissions. If some information is missing or incomplete, you will be alerted to provide more details.
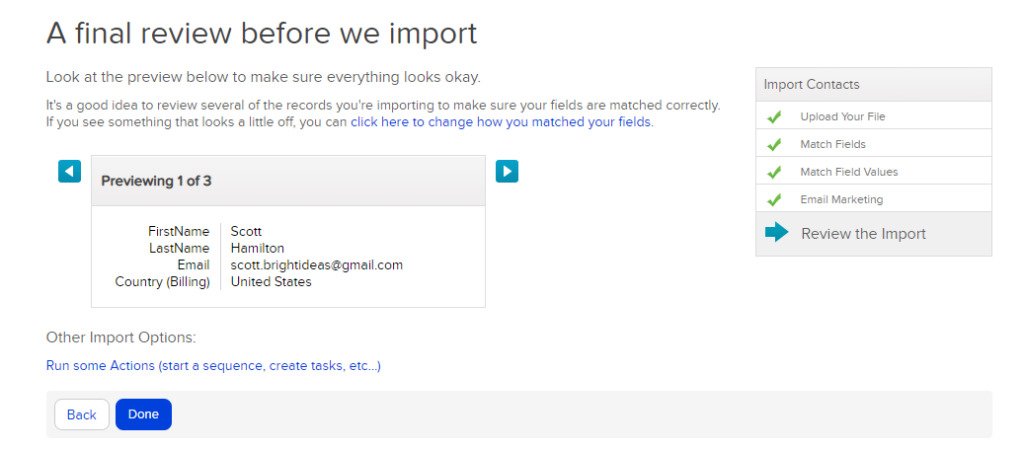 Click on “Other Import Options” to add additional import actions such as tag apply, send an email, create a campaign, and other activities, and click Done to begin the import.
For Keap Pro and Keap Max versions:
Step 1:
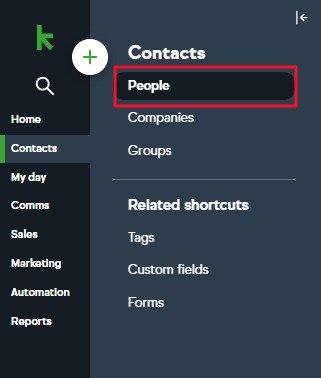
Click Contacts > People from the navigation menu.
Step 2:
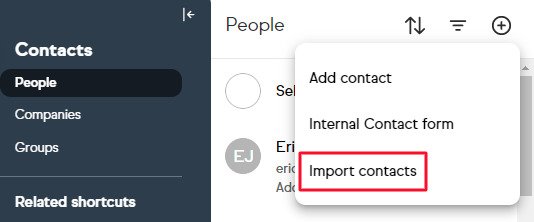
In people, click the “+” symbol and select the “Import Contacts” option from the menu.
Step 3:
You will get multiple options for Import Contacts in Keap. If you want to transfer your data from Mailchimp, Hubspot, or any other given platform, then you can select import type as that particular platform. Now select your import type.
Step 4:
For a CSV file, either click to upload or drag your file and drop it into the import window to import contacts in Keap.
Step 5:
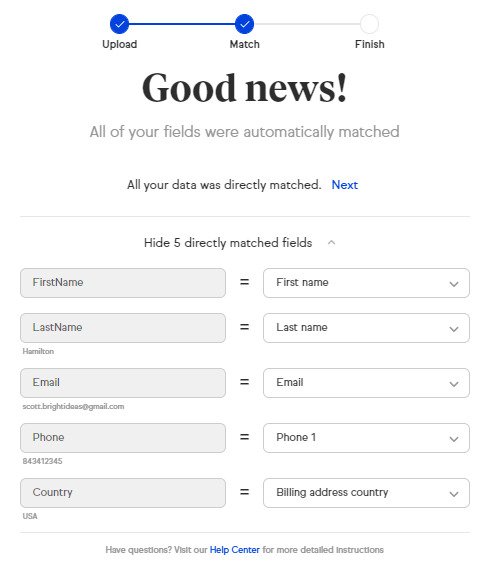
CSV sheet fields will automatically map to your Keap fields after uploading your CSV file. However, if there are fields that cannot be matched, match the Keap fields on the right to your CSV file columns on the left.
 Click the Show matched fields link at the bottom of the screen to view the auto-matched fields and click Next once all fields match correctly.
Step 6:
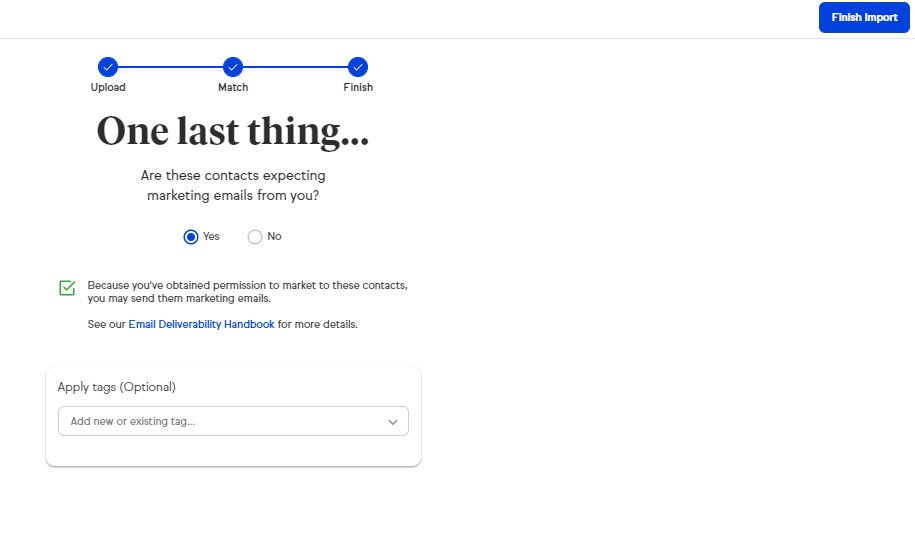
The last step is to indicate if you have Explicit permission to send marketing emails.- Check Yes if you have permission to send emails to contacts and review the Acceptable Use Policy.
- Check No if you do not have permission. In this, you can send emails directly through the contact record but wouldn't be able to send bulk emails from an Email Broadcast or automation sequence until your contact opts in.

Step 7:
Click Finish Import when you're done. You can view your imported list from Tags by clicking on the tag that was automatically created for your import. Learn how to create and manage tags in KeapTo Update bulk contacts in Keap-
You can use the Keap import tool to update multiple existing contacts already in your account based on their email. To update your contacts, create a .csv, .xlsx, or .xls that includes the contact's email and any other information you wish to update, then import the file as normal.How to Import Contacts in Infusionsoft
Step 1:
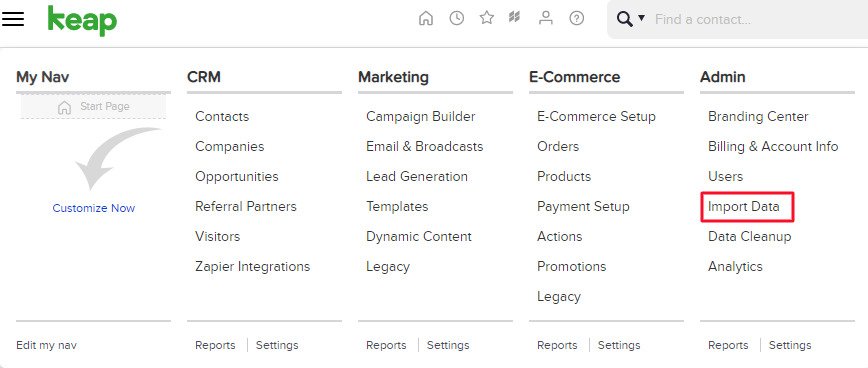
Navigate to Admin -> Import Data.
Step 2:
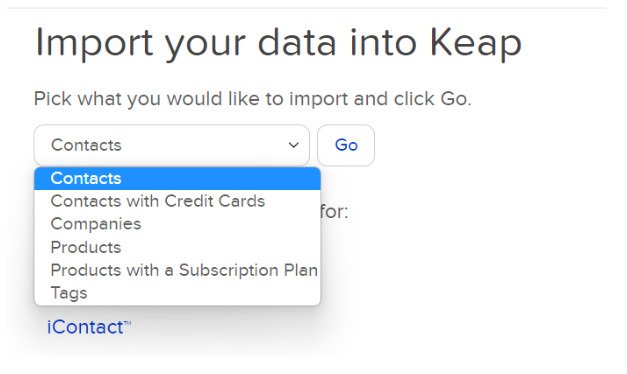
Select the type of data you want to import into the Keap account, whether it is contacts, companies, products, or tags, and click the Go button.
Step 3:
Now click on Browse to select a CSV file from your computer and keep in mind that your CSV file should be at most 10 MB. If you have a file larger than 10 MB, you must split it into multiple files and import your data into Keap. You can also use free software like Free Huge CSV Splitter to help you. Browse your import file from your computer and click Next to start the import wizard.
Also, if your file contains too many contacts and you go over your contact limit, you will see the message “You are unable to import these people because it will put you over your limit of 20000”.
At this time, you can either purchase an additional contact package or clean old contacts from your database.
Step 4:
Match Fields Match Keap fields with the field name from your spreadsheet, which is on the left column. Select the matching field from each drop-down. If a matching field is not listed in the drop-down menu, you can create a custom field or select Do not Import this field to omit the field from the import in Keap.
Step 5:
Select your matching field from each drop-down. If you need to populate multiple fields with data from one spreadsheet, click on the Additional Field Matching Options link at the bottom of the page. Click Next once you have finished mapping your fields with Keap fields.
Step 6:
Confirm Explicit Permission to send an email. Read through the permission guidelines and choose Yes or No.- Check Yes if you have permission to send emails to contacts and review the Acceptable Use Policy.
- Check No if you do not have permission. In this, you can send emails directly through the contact record but wouldn't be able to send bulk emails from an Email Broadcast or automation sequence until your contact opts in.
 Click Next after you have successfully selected the email marketing permissions. If some information is missing or incomplete, you will be alerted to provide more details.
Step 7:
Review your import data. Click on Previous or Next to scroll through a few records to verify you matched the fields correctly. Also, you can change your matched fields by clicking on “Click here to change how you matched your fields.” Click on “Other Import Options” to add additional import actions such as tag apply, send an email, create a campaign, and other activities, and click Done to begin the import.

