How to Set up Keap Appointment Booking Page
Keap Appointments allows you to easily manage your schedules by viewing, rescheduling, or canceling appointments. You can quickly send your booking link to contacts via email or text or share the link online or in automation. Let’s learn how you can set up your Keap appointment booking page:
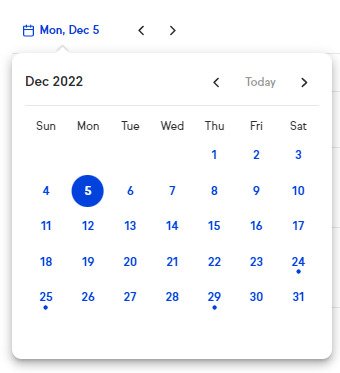
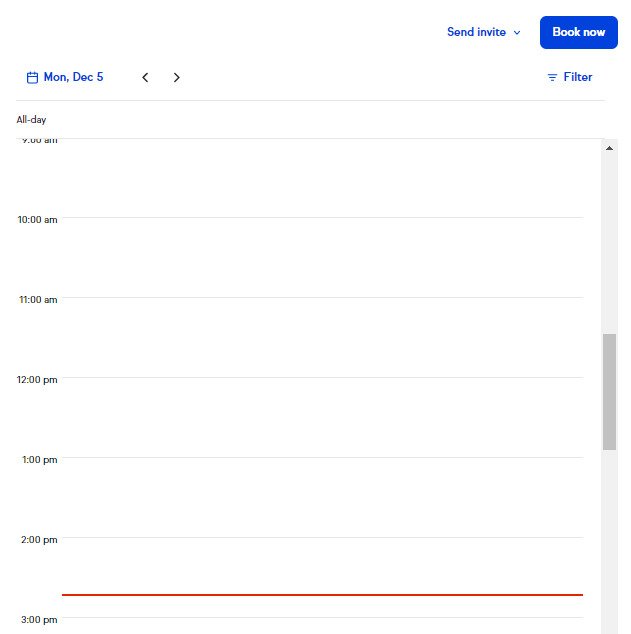 To view another date, simply click on the date located above your daily schedule. Today's date is circled with a solid circle, and days with calendar events have a dot beneath them.
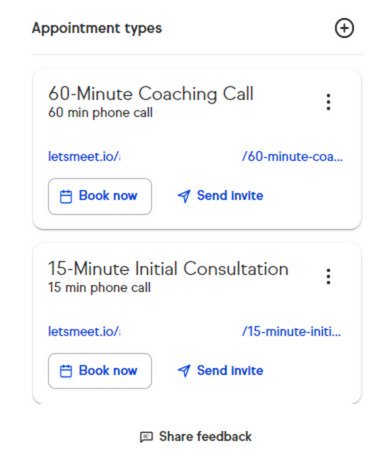
 After connecting your calendar, Keap will automatically create two appointment types for you: a 15-minute "Initial Consultation" and a 60-minute "Coaching Call". You can use, edit, or delete these appointment types as desired.
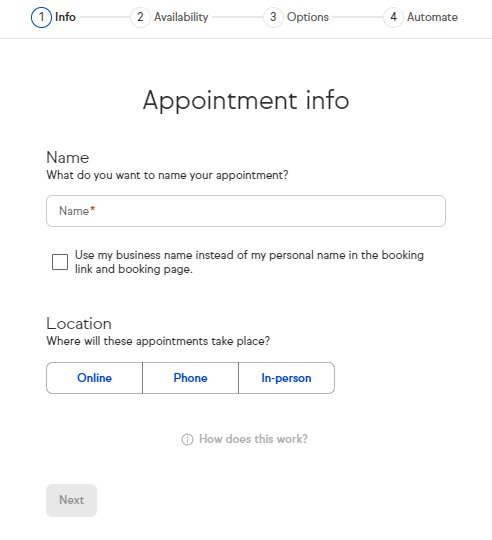 Opt to use your business name by clicking the box instead of your name in the booking link.
- For Location: Online - You can provide an online meeting link or let the invitee provide a meeting link.
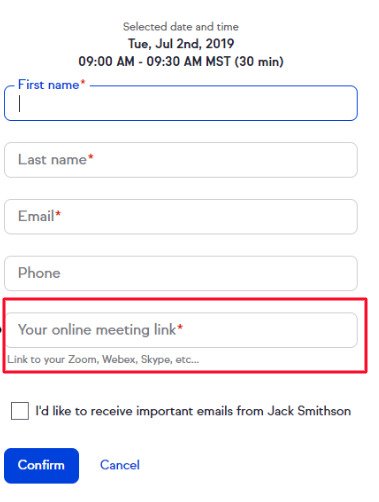
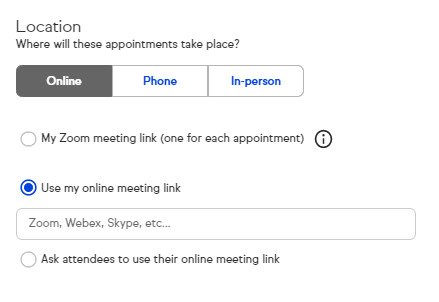 If you’re choosing “Ask attendees to use their online meeting link”, the invitee will be required to fill in Your online meeting link field on the appointment invitation they receive by email.
 - Location: Phone - You can choose to call the customer (ask the invitee for their phone number) or request the invitee call the user (by providing a phone number for the invitee to call).
- Location: In Person - The user can choose the meeting location and provide an address or let the invitee choose the location (request an address from the invitee).
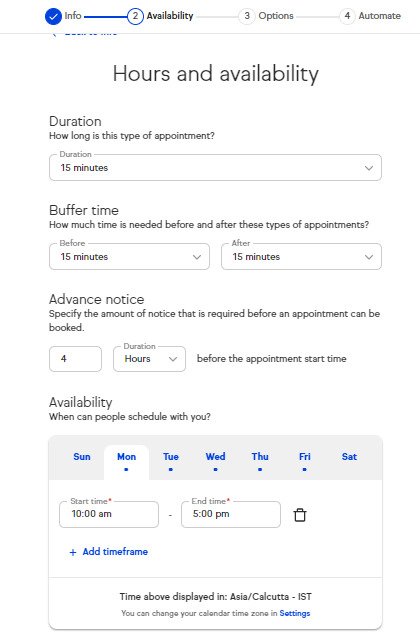 Choose the time frames across any day of the week that you want to be available for an appointment. You can add additional timeframes to that day by clicking “+Add timeframe”.
After selecting all the desired settings, proceed by clicking Next.
 Click Done. And you will be able to see your booking link with all other bookings on the left-hand side of the page. Also, learn how to create keap tags.
Step 1:
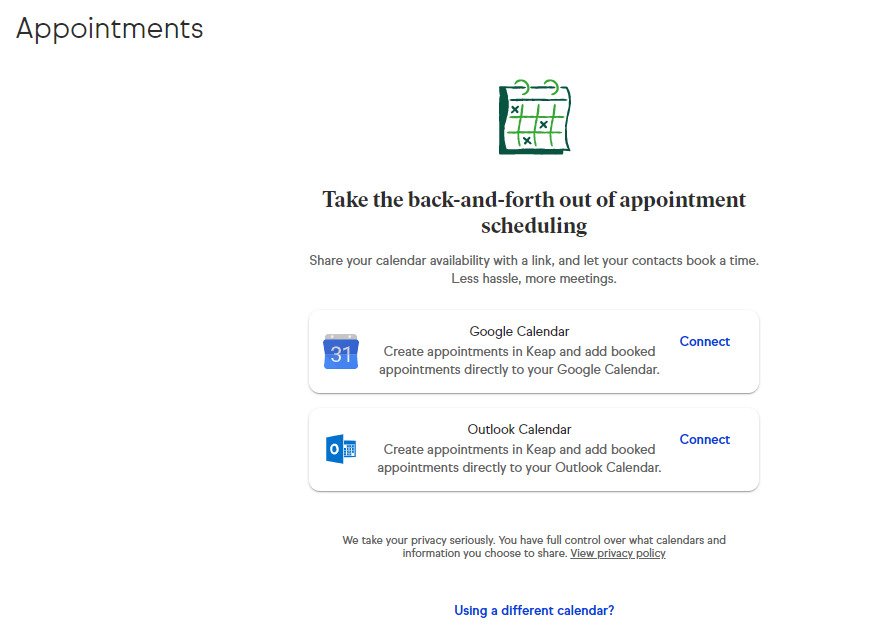
Connect your calendar with Keap. To set up your appointment booking page, you need to connect your calendar with Keap, whether it is Google Calendar or Outlook Calendar. First, to connect your calendar go to “My Day” and click the Connect option of which calendar you’re using to set up Keap appointment.
Step 2:
Appointments overview. After connecting your calendar with Keap, your daily schedule will appear on the right side of the Appointments page. To view another date, simply click on the date located above your daily schedule. Today's date is circled with a solid circle, and days with calendar events have a dot beneath them.
 After connecting your calendar, Keap will automatically create two appointment types for you: a 15-minute "Initial Consultation" and a 60-minute "Coaching Call". You can use, edit, or delete these appointment types as desired.

Step 3:
Add an appointment type. Click the "+" button to create a new Keap appointment type. Specify a name linked to your appointment, such as 'Consultation'. And remember that the name will become the end of the booking URL. Opt to use your business name by clicking the box instead of your name in the booking link.
- For Location: Online - You can provide an online meeting link or let the invitee provide a meeting link.
 If you’re choosing “Ask attendees to use their online meeting link”, the invitee will be required to fill in Your online meeting link field on the appointment invitation they receive by email.
 - Location: Phone - You can choose to call the customer (ask the invitee for their phone number) or request the invitee call the user (by providing a phone number for the invitee to call).
- Location: In Person - The user can choose the meeting location and provide an address or let the invitee choose the location (request an address from the invitee).
Step 4:
Hours and availability Click Next. Now you can select appointment duration from the standard durations (15, 30, 45, 90 minutes, 1 hour, or 2 hours increments). Select a custom duration by scrolling to the bottom of the appointment duration drop-down. In addition to setting a buffer time of 15, 30, or 45 minutes between appointments, you can specify the required time before a booking can be made on your calendar using the Advanced Notice option. Choose the time frames across any day of the week that you want to be available for an appointment. You can add additional timeframes to that day by clicking “+Add timeframe”.
After selecting all the desired settings, proceed by clicking Next.
Step 5:
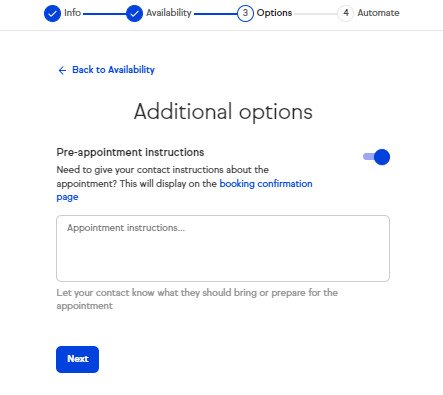
Additional options Activate the toggle to add Pre-appointment instructions for the clients and they will see the pre-appointment instructions at the top of the booking confirmation page. Click Next.
Step 6:
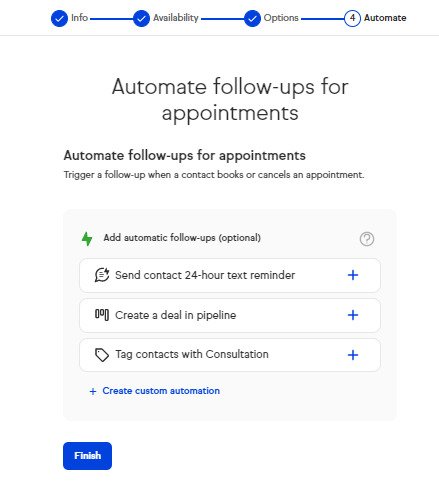
Automate follow-ups for appointments You can create automation for appointment follow-ups or create custom automation by clicking “+create custom automation”.
Step 7:
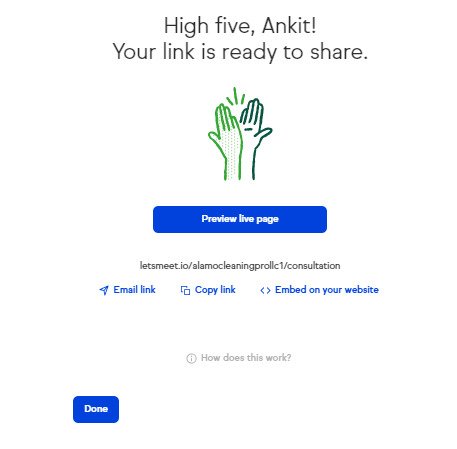
Now your Keap appointment page is ready and you can preview the live booking page, Email the booking link, copy the booking link, or access the booking page code snippet to embed on your website. Click Done. And you will be able to see your booking link with all other bookings on the left-hand side of the page. Also, learn how to create keap tags.
